 Here's another photo of Alyssa. Unfortunately the weather turned pretty cold and rainy when were were shooting on Saturday, so we changed locations form the Strand to a covered area near the medical library on the UTMB campus. Sepia conversion was done with Nik Silver Efex, and in Photoshop I also did some minor perspective correction to the repeating columns in the background. Camera settings: Nikon D200, 85mm, 1/320 sec at f/1.4, off-camera flash from high and to the right - high speed sync to add to the limited depth of field I was going for.
Thursday, December 31, 2009
Alyssa #2
Here's another photo of Alyssa. Unfortunately the weather turned pretty cold and rainy when were were shooting on Saturday, so we changed locations form the Strand to a covered area near the medical library on the UTMB campus. Sepia conversion was done with Nik Silver Efex, and in Photoshop I also did some minor perspective correction to the repeating columns in the background. Camera settings: Nikon D200, 85mm, 1/320 sec at f/1.4, off-camera flash from high and to the right - high speed sync to add to the limited depth of field I was going for.Sunday, December 27, 2009
Testing Out a New Lens
 This is Alyssa, my second cousin once removed. She was patient enough to pose for some photos Saturday as I tested out a new lens on a cold, grey day down in Galveston. This was taken in the alley near 20th and Strand behind an antique car museum. They have this old painted mural on the wall that's seen better days -- lots of peeling paint, but it makes for an interesting background. Nikon D200, 85mm at f/2.0, off camera flash from the right, retouched in Photoshop with a final layer of OnOne's Phototools Jack Davis Portrait Glow at the end. I had the worst time exposing for her white jacket. I could never balance the exposure for both the face and jacket, ended up overexposing the jacket in the raw file. Thought I'd recover it in Camera Raw, which I did. But in the end, with the glamor glow effect, ended up blowing it out even more. But I like the effect. Goes to show you sometimes cameras are smarter than the dummies pushing the buttons.
Saturday, December 26, 2009
Renaissance Festival #3
 Here's another photo from the Renaissance Festival last month. This is Kat Denson, who I photographed last year with Larry in bright sun. We both thought the images we got from that session were pretty much unusable because of the harsh light. I attempted to salvage one of them and got surprisingly good results. I posted it on my blog a few months ago. Here's the link. This year, Doug and I photographed Kat as she danced as part of the Gypsy Dance Theater group. With changing light, lots of movement, and neither of us using flash, it was a difficult situation to shoot in. A food pavilion provided the background for this image -- 1/400 sec at f/3.2, +1 EV. In Photoshop I did some touchups to the background sky, also added a black and white layer in luminosity blending mode at 70% to add a little pop.
Monday, December 21, 2009
Renaissance Festival Violinist
 Here's another photo from the Texas Renaissance Festival. This woman is the violinist for the Gypsy Dancer Theater group that Doug and I photographed throughout the day. She is the mother of the little girl in my last two blog entries. From our vantage point for the performance, there were two good backgrounds to shoot against -- the gold-colored building that the young girl is shot against below and the trees behind one small part of the stage. This shot is the tree background. Decent bokeh here, but it's mostly obscured with my texture work -- three layers: sheet music, warm emulsion, and edge, all masked and blended pretty heavily to get the effect.
Soundtrack: Rufus Wainwright - Want Two
Sunday, December 20, 2009
Young Girl at Renaissance Festival #2
 Same image as the previous with some tweaks -- cropped a little tighter all around and especially from the top of the head. I also tried to shift the blue color of her blouse to more of a warmer color -- not as easy to do as I thought. Maybe it would be best to leave the blue color there. Just thought I'd give it a try.
Wednesday, December 16, 2009
Young Girl at the Renaissance Festival
 Some images that you capture haunt you. This one does that to me. Maybe it's because I don't have children, and I'm not around a lot of children, so there's something about the intense gaze of a child into my camera lens that intimidates me. I'm not used to seeing it through my viewfinder, and I'm a little uncertain how best to process it now that I've captured it. This young girl was one of the first people Doug and I met at the Renaissance Festival a couple of weeks ago. We were walking through the fairgrounds as the gates opened and came across her and her mother, who was the violinist in the Gypsy Dance Theater group that performed at the festival. We asked to take their photos, and the young girl seemed very shy, perferring to play with her doll than have her photo made. We took a couple of photos of them --- nothing too spectacular. About lunch time, Doug and I were in the audience as the Gypsy dancers performed, and during one of the breaks in the show this young girl came out onto the stage to collect donations. She leveled the look you see above at me, and I couldn't help but fire off 5-6 shots --- no flash, no posing, no composing a background.
First off, I got lucky with the background, which was a large gold-colored building that sold Greek food. Since light was constantly changing I was shooting at f/3.2, 1/400 sec, +0.7 EV with my 70-200 VR lens, just getting what I could out of a challenging situation. In postprocessing, I did some minor touchups to the background, took out some shadows under her eyes, brightened up her eyes a bit, and did some selective sharpening to the face and hair. I also added two layers at the end to warm the skin tones a bit, and I also put a black and white Silver Efex layer in at 36% opacity to add some contrast and depth. Now my question is this. What else should be done to this image? It's a starting point, but I don't feel it's final. A couple of things I thought about doing were: 1) to go ahead and crop into the top of the head and 2) to color shift her blouse from blue to yellow/gold to make the image more monochromatic. Like I said at the beginning, this one haunts me. I like the shot. I just don't feel 100% comfortable postprocessing images of young children. Any suggestions are welcome.
Tuesday, December 15, 2009
Mission San Jose
 I'm finishing up my San Antonio Missions project for our friends -- six framed prints for their home. I received the prints from mpixpro.com last night, and they came out great. So I thought I'd post some to the blog. This is Mission San Jose photographed in August. I remember how blazing hot it was that day, and now a few short months later we've had four straight days of fog and 50 degrees.
Sunday, December 13, 2009
Dickens on the Strand #2
 This photo was taken at Dickens on the Strand last weekend in Galveston. Larry and I photographed this same woman last year while she was working in a booth, and we both were unhappy with our results. We both tried our hand at salvaging an image. Mine was posted on this blog here in May. Basically the booth background ended up being too distracting for anything really usable. This year, we saw her along the Strand and were able to move her into a neutral background. This was shot with two softboxes against a wall on 23rd and Strand. And while this photo didn't do very well at our photo club meeting last week, I was happy to get a decent portrait of this woman ... a year later.
Wednesday, December 9, 2009
Renaissance Festival #2
 Far from my best shot at the Renaissance Festival, but this one has an interesting story. Doug and I met these two guys in armor and of course wanted to photograph them. He was up first and got to shoot the bright silver one; I on the other hand, got the guy in full black armor. What luck. After a couple of shots in shade and almost giving up, I moved him into a little bit of sun. Still dark on my LCD I shot another 3 or 4 shots, but I didn't really have much hope for any of these images. But I needed to get a decent image to the guy under the helmet here, so I went to work in Photoshop. This is where Topaz Adjust really saved this shot. It opened up the shadows and added some nice texture to an otherwise bland and dark image. After Topaz, I realized how hard the camera was working here despite the dark subject and background. Note how sharp the eye is even through the helmet, and the background is really rendered pretty nicely. I have no idea how a catchlight ended up in the eye with all that mask in front. As I remember it, Doug was off camera right with the flash. Goes to show you no matter how badly things look on the LCD, there is still decent data being captured on that sensor.
Tuesday, December 8, 2009
Lauren #6
 After all we put Lauren through a few weekends ago in awkward places and nontraditional poses at our trash the dress photo shoot, I thought it would be nice to do a very simple head and shoulders portrait of her. This image was taken during a little break in shooting as we waited for the sun to change positions. She was sitting on the street curb right in front of a bright red fire hydrant. I asked her to lean forward to get a small piece of the hydrant out of the frame, and with Mike providing some fill light from the left I took about a dozen shots at f/2.8. The background that became out of focus here is the sidewalk awning of an old department store on Postoffice Street, which was about 20-30 feet away. I also did my basic 10-minute beauty retouch here -- smoothed and refined the skin, brightened the eyes and teeth, and did some selective sharpening of the eyes, mouth and hair. The background is pretty much untouched.
Sunday, December 6, 2009
Dickens on the Strand #1
 This weekend was Galveston's annual Dickens on the Strand Festival, where many dressed in Victorian costumes. These two characters have been there as long as I can remember -- Jacob Marley (from Dickens' A Christmas Carol) and Father Christmas. We thought they made a nice pair and took a couple of portraits of them. As things worked out Saturday we ended up with two softbox lights, so many of my photos from Dickens will be the usual set up plus an additonal light. One big advantage we found having another light in the mix was the ability to put some light under the brim of someone's hat while having another to light overhead. Fun as always; Larry Patrick, Doug Haass, and I stalked many with our lights on sticks and cameras. This particular shot has a bit of a twist. As fast as we try and work, I knew I couldn't carry the focus on both characters faces with one shot, so I quickly took two in sequence with each character in focus. This is the resulting image, where they have been combined in Photoshop.
Friday, December 4, 2009
Lauren #5
 Another shot from the trash the dress photo session with Lauren a few weeks ago. This one against the great red doors we found in the Galveston alley. Ambient lighting was very heavy from off camera left, pushed a little further with some fill flash from that same side. In postprocessing, lots of vignetting was added that I think added to the lighting and gave the image some pop and drama. Nikon D200, 1/45 sec at f/4.
Tuesday, December 1, 2009
Renaissance Festival #1
 Steve Schuenke's rule #1 for postprocessing Renaissance Festival images --- don't be wimpy. Throw the kitchen sink at an image and pull back the layers to see what's left. That's just about what I did with this image of a vendor selling metal claw gloves at the Texas Renaissance Festival. Doug Haass and I went to the festival on Saturday, taking impromptu portraits of anyone who we thought would make an interesting subject. Like my trip shooting there last year with Larry Patrick, we used a flash on a paint stick shot through a small softbox triggered with Alien Bee remotes. It makes for a nice set up -- very lightweight and flexible. You can put light under someone's hat, overheard for more of a beauty look, or across the face for drama. In fact, I've found shooting like this -- when you have about 2 minutes to evaluate the subject, pick a background, figure out some kind of lighting, and then take a couple of photos -- is probably one of the most challenging and rewarding kinds of photography. You never know who you're gonna meet and what you will bring home on a memory card, but you will learn how to light.
My kitchen sink of layers here included: Topaz Adjust, a couple of great scratched textures, and quite a few curves adjustments to add some depth and dimension.
Sunday, November 29, 2009
Lauren #4
 Another shot from the trash the dress photo shoot with Lauren. I can't remember exactly if the strong backlight here was natural or with a flash. I think probably a combination of both, so I went with it and made the skin tones a little more high key. What is it about a portrait subject looking off camera that makes it a more intriguing image? Especially here in a wedding dress. Anticipation? Nervousness? Somehow this photo appeals to me, but can't seem to figure out if it's the pose or the contrast between the soft subject and the rough background.
Tuesday, November 24, 2009
Lauren #3
 Back to the Lauren bridal shoot for this one. In this alley in Galveston, there was a doorway about 5 or 6 feet off the ground. Weird, I know. Galveston never ceases to amaze you with its quirkiness. I guess it's part of the charm ... or local flavor as they say. Anyway, this doorway to nowhere was on a cream-colored wall and was just too good to pass up. Luckily Shirley brought a ladder so we were able to get Lauren up there. A flash in a softbox was firing from across the alley -- about 15 feet away; and while most people shot, I decided to change lenses to the 70-200. So from my position farther away and down the alley after changing lenses, I decided to shoot some really shallow depth of field shots. I asked Lauren to lean out, and I shot away at f/2.8. The vintage texture was added and masked into the shot in Photoshop. The three protrusions from the wall on the left are part of windows in the building, not part of the texture. Cindi has a good shot of the scene here on her blog.
Monday, November 23, 2009
Bonaventure Cemetery
 This photo was taken in Bonaventure Cemetery in Savannah. I was heading to Tybee Island that afternoon and didn't have a lot of time to spend there, but there were some amazing trees, headstones and Spanish Moss there. This one was shot as I walked from one section of the cemetery to another. I added the sepia tone and vignetting with Nik Silver Efex and did a little touch up work on the road down the center. But even after the touch ups, there are a fair amount of shadows and high contrast areas along the path. I'd be interested in getting comments about that -- would it be worth the time to "clean up" the path? Nikon D200 at 85mm 1/100 sec at f/6.3.
Sunday, November 22, 2009
Lauren #2
 Here's another shot taken last weekend at our Trash the Dress photo shoot with Lauren. It's funny shooting wedding portraits in nontraditional styles and poses. At times it throws you a little -- like it breaks all the rules of formal portrait photography, but after shooting a while you start to see the appeal. This is Lauren in an alley on the Strand in Galveston, posed against the great red door we found. Like I said, it's a little disorienting at first -- color break across her head, nontraditional pose, pink Chuck Taylors, grass and bricks at the bottom. I decided to add to the texture here by adding a color shift layer done with OnOne PhotoTools, another texture layer to further add to the overall grunge, then a photo edge in overlay blending mode. I've been working with edges for a while now, and this one was a little different. I tried to work the image into the edge a little more -- first by putting the edge in overlay blending mode and second by masking selected parts so the tones of the photo would interact a little more with the black frame. Nontraditional postprocessing for a nontraditional image.
Friday, November 20, 2009
Jekyll Island Shore
 Here's another from Jekyll Island. This was taken before the dune shot I posted yesterday. I thought it was interesting how the reflected sunrise played with the moving water in the surf. Shot on a tripod - f/11 at 1 second.
Thursday, November 19, 2009
Jekyll Island Dune
 This photo was taken last Saturday on Jekyll Island, Georgia. After shooting the sunrise for about 30 minutes, I turned around and took some shots of the dunes and clouds in the western sky. This is a 5-frame series merged together with Photomatix Pro. It had an odd pink color cast to it so I used Nik Silver Efex to do a black and white conversion, and I think it helped this shot alot.
Tuesday, November 17, 2009
Forsyth Park Fountain
 Sorry Lauren fans out there, back to Savannah for this shot -- taken last week in Forsyth Park. I was trying to get a little added motion in the water, so shot it at 1/100 of a sec. Went back at night and tried some really long exposures the next day and the white balance was really difficult to deal with all the light sources in and around the park. This was taken on a very cloudy day. Nice that there were no hard shadows, but since it was fall, lots of long-hanging branches -- enough so you can't see the top of the fountain. Cropped panoramic, cloned out a few distracting elements, added a Silver Efex layer in luminosity blending mode to add a little contrast and pop, also added a slight gold glow to the three lamps.
Monday, November 16, 2009
Lauren #1
 Bet you thought the next photo would be from Georgia, Louisiana or maybe the airshow. Lots of images to postprocess in the coming days and weeks, so the posts are gonna be kind of shotgun style for a while. I plan on working on things as I get inspired. This photo was part of a really great series that Cindi, Mike, Shirley and I did Sunday afternoon in Galveston. It was taken in one of the many great alleys down there. This was a "trash the dress" photo session with our terrific and patient model Lauren. We were trying to put some things into practice that we learned at the McNally workshop last weekend. Not the sharpest image I've ever shot, but I think a little softness isn't necessarily a bad thing in this kind of moody image. Nikon D200 with the 70-200 VR lens at 140mm, 1/100 sec at f 2.8, off camera flash from slightly below with a softbox and from behind with the latest craze in light modifiers -- the $1.99 plastic juice jug light sphere. McNally said about some of his models two weeks ago, you could shine a car headlight at them and get great results. Well, Lauren has such great, luminous skin tones I can now add that you can shoot light through a $1.99 plastic juice jug and get great results too.
Sunday, November 15, 2009
Emergency Exit View
 This was my view from the emergency exit on the flight from Birmingham to Houston yesterday as Kim and I returned from our trip to Savannah and Jekyll Island, Georgia. What a great flight -- beautiful sunset, lots of leg room, and no screaming kids. It doesn't get much better. More photos to follow from the trip...
Thursday, November 12, 2009
Captain Barry King
 Since I do a little freelance work for the Galveston Historical Foundation, I often get to go sailing on the Tall Ship Elissa, a restored 1877 iron barque that the foundation purchased in 1975 and runs as a floating museum. It's manned by a volunteer crew throughout the year, but in the spring captains from New England come down to take Elissa on day sails out into the Gulf of Mexico. Above is Captain Barry King from Maine. He's been an officer on the Elissa each spring that I've been sailing on her, but seeing him every year causes a little uneasiness on my part. You see, in 1987 when I was fresh out of college I began working at the University of Texas Medical Branch. And a photographer who worked there named Roger Stone, just happened to be in the office across the hall from me. And while I proofread typeset galleys and set about learning graphics on a Mac Plus, Roger became a friend -- someone I looked up to and would talk to about finding my way in the field of graphics and photography. He was by far one of the most easygoing and giving people you'd ever want to meet. On top of that, he was a sailor and a great photographer. He did fantastic infrared work in the time when it didn't mean just screwing on a filter or moving some sliders in Photoshop. He did it with film.
Tragically, Roger was killed in a sailing accident about a year and a half ago helping to save other sailors from Texas A&M University while on a regatta in the Gulf of Mexico. Here's a link to the story. You'll also see a photo of Roger there. And I think you'll also see why I feel so uneasy when I see Barry King. The two share an uncanny resemblance -- both in looks and through their love of sailing.
So when I'm out on the Elissa with Captain Barry King I think of my friend Roger Stone. Whether it's rough seas or no wind at all, the Elissa heads out for sea trials every spring -- ensuring she's seaworthy and making sure she's strong enough to endure the inevitable onslaught of nature. Because as we stare at the horizon we'll never know what terrible ... or sad ... or teriffic things lie ahead.
Sunday, November 8, 2009
My Modeling Fee was Reasonable
 This weekend, I attended legendary photographer Joe McNally's lighting workshop in Houston along with a group of other photographers from the Bay Area Photo Club. I never expected to be in front of the camera, but I was plucked from the audience with the two other big guys in the background for the photo above. We were supposed to provide a foil to the two pretty young women in front who modeled for Joe during the two-day event. Our job was to act big, burly, and mean (bodyguard like). Anyway, kind of a fun 15 minutes. Thought I'd post a photo that Joe's assistant Drew Gurian was nice enough to give me on a jump drive. So judge for yourself, do I give up my day job for a career in modeling? Being big and intimidating is not as easy as it looks, I tell ya. Now if only Joe knew how to use light properly he would have thrown that deep Octa on me, and maybe......
Friday, November 6, 2009
Harrier
 Another shot from the air show -- a Marine Corp Harrier demonstrating its vertical landing and take-off abilities. Shooting data: aperture priority, f/7.1, 1/500 sec at 300mm.
Wednesday, November 4, 2009
My Take on the Re-enactment
 Here's another photo from Sunday's air show. Every year, they do a battle re-enactment of the attack on Pearl Harbor complete with pyrotechnics and soldiers on the ground. They said the Japanese Zeros were replicas created for the movie "Pearl Harbor." In years past I've always seemed to catch a couple of planes flying through smoke and flames, which makes for a pretty dynamic shot. But this year, when my focusing was at its best, I didn't get that great smoke-filled shot. So I decided to add my own vintage mood to this photo with a couple of layers of clouds and textures. To start with I desaturated my raw file pretty significantly, then added a Nik Color Efex paper toner layer in overlay blending mode to add some contrast and desaturate the image even further. Then I added a couple of film emulsion layers, one in multiply blend mode at 38%, the other in color burn blend mode at 15%. Then the clouds and vintage texture layers came in to further tint and age the image, each masked and applied selectively. Original exposure data was: shutter priority, 1/500 sec, f/9, +0.3 EV, panning with the 300 f/4 lens. After a couple of years of shooting at the air show, I've learned that 1/500 sec shutter speeds will usually give you just a bit of blur in the propeller.
Tuesday, November 3, 2009
A More Perfect Day
 No one can complain about the great weather we've been having lately, especially for the air show this past weekend. I guess my only wish would have been for a few clouds in the sky...and with the help of Photoshop here they are. This is a photo of an F15E Strike Eagle taken at Wings Over Houston on Sunday. The original shot was against a flat blue background, and honestly it gets pretty boring looking at a couple hundred flat blue sky airplane photos, so I decided to enhance this one. I used the quick select tool to make a selection of the blue sky (which was very easy since it was such a consistent blue tone), selected inverse to get a selection of the plane, then moved that to a layer by itself. I then created a layer below the isolated plane and used some great brushes from Stephanie Shimerdla over at Obsidian Dawn to underlay some big white fluffy clouds.
Now, this brings up the issue of ethics and photo retouching. Since this isn't photojournalism, I don't feel particulary guilty of anything here. In fact, dropping in a new sky or altering a sky is probably one of the easiest things to do to a photo. I've heard Scott Kelby over at NAPP say he never makes significant alterations to a sky. However, all the while he's doing HDR and using blending modes to enhance images; so I think he is re-shaping reality to some degree. His stance on skies has always puzzled me. I guess it comes down to trust. Does the knowledge that I added a few clouds cause more doubt in the viewer's mind? Were the vapor trails really there? Was this photo taken at Wings Over Houston? Did I take the photo?
Once you start down the path of alteration, does it effect credibility of the photographer? It's a tough line we walk, but one that happens every day as we push pixels around on our computer screens. Like it or not, this is the world of contemporary digital photography.
Blue Angels #2
 Here's another photo from Sunday's Blue Angels show at Wings Over Houston. In this one, the #1 and #4 planes are inverted. I was shooting bursts, and got lucky to get this one with a decent composition at almost a perfect right angle as they passed. The only Photoshop work was a little cropping from the top and bottom and a mild amount of sharpening masked just to the planes.
Sunday, November 1, 2009
Blue Angels
 The weather was perfect for the 25th Annual Wings Over Houston Air Show this weekend. Crowds were huge partly because of the weather and also because the Navy flying team the Blue Angels were performing. It's been a while since they've flown at the air show. I've been tweaking my focus modes on my camera lately, really trying to learn what's best for a given situation. Today it was dynamic area focus with closest subject priority, and that really seemed to work well. My percent of keepers (as far as focus) was as high as it's been in recent air show memory. The image above was shot at 1/1000 sec, shutter priority, f/5 with my 300 f/4 lens; I just did a little cropping and sharpening in Photoshop. That 300 f/4 really is a perfect lens for air shows -- sharp, responsive, and light weight.
Friday, October 30, 2009

Wednesday, October 28, 2009
Penny & Earl
 This nice young couple from Birmingham, Alabama was staying at the same bed and breakfast as Kim and I were this past weekend in St. Francisville, Louisiana. It seemed like we saw them everywhere on Saturday -- at breakfast, on a tour of Rosedown Plantation, and here at the Afton Villa Gardens north of St. Francisville. They both have that unique southern charm and wit -- it was really a pleasure meeting them and getting to know them a little. I asked if I could take a couple of photos here at the pond in the gardens. After a couple of exposure tweaks and a few texture layers in Photoshop, here's my impromptu portrait of a happy couple enjoying a Saturday together. I mentioned in the previous post about how everyone who visits Oak Alley will come away with a similar shot. The image above, however, is a shot no one has. I think that's why I'm so intrigued lately by photographing people -- the infinite possibilites of capturing a moment that will never happen again.
Tuesday, October 27, 2009
Oak Alley Plantation
 Earlier this month the assignment for the Bay Area Photo Club was “Breaking Photographic Rules,” and I have to say I wish I had taken this shot in time for that night. This is Oak Alley Plantation in Vacherie, Louisiana. Kim and I made a trip over to Louisiana this past weekend, touring a couple of plantations and gardens, and of course taking photos along the way. I found myself standing on the grounds of these majestic homes taking this same shot over and over. Honestly, how else can you say you’ve visited Oak Alley without taking this shot? I’m sure a fine art photographer would find some unique angle; but for me, straight in, locked down tight on a tripod was the rule for the day. There’s been much talk about HDR – high dynamic range – photography lately, many thinking it creates surreal imagery – for good and bad. Well, this is HDR – controlled to blending exposures only, no hyper-realism here. Trey Ratcliff, over on his Stuck in Customs blog, has a book about HDR coming out soon, and an excerpt he has on his site mentions that often greens are oversaturated in HDR. I’ve run into this a lot lately – especially in my shots of Virginia and Louisiana. So after merging my five frames in Photomatix here, I desaturated the greens in the foreground grass and increased the pink tones in the building and walkway. I also learned a valuable lesson about lens sharpness on this trip. I shot these frames at f/22 thinking I needed the added depth of field, but after comparing my f/8 shots with these, the f/8 shots were actually sharper. I had to do some extra sharpening to the plantation to get an acceptably sharp building. So, here it is – two weeks late – my breaking of photographic rules. Oak Alley the way every tourist shoots it – bullseyed right down the middle.
Thursday, October 22, 2009
Kelly Crabb #3
 Another image from the shoot with Kelly Crabb -- this one near sunset along the Galveston Ship Channel. The large out of focus structure in the upper left is the bowsprit of the Tall Ship Elissa. Strobist info: two SB800s fired from left and right, one with a small softbox (left), the other bare flash, both at 1/8 power. I only noticed this is postprocessing but the back of her upper left arm (below the out of focus lights) is backlit in red. There were some ship's navigational lights on the dock, and I believe this is where that came from. Not necessarily good or bad, just something I didn't notice when I shot it, but becomes obvious when you're working at 400% in Photoshop.
Tuesday, October 20, 2009
Kelly Crabb #2
 Here's another photo from Friday's photo shoot with Kelly Crabb. This one was taken shortly after the previous image; lighting setup was about the same also. The location was the pedestrian alleyway behind Yaga's on the Strand in Galveston. Black and white conversion was done with Nik Silver Efex; white emulsion edge was done with OnOne PhotoFrame; and the black negative edge was from Kevin Kubota's Sloppy Edges package. Let me know what you think of the black and white here. I think I've always had it in my mind that black and white was for an image with exposure issues -- and that the conversion offered a quick fix. I've been hesitant to do that with these images of Kelly because they are pretty clean straight out of camera. This one, however, seemed to work pretty well in black and white. I'm posting the color image below.
Sunday, October 18, 2009
Kelly Crabb
 I had the pleasure of photographing actress/model Kelly Crabb Friday down in Galveston. She was on the reality TV show The Amazing Race Season 13. We've been trying to work out the details for a photo shoot for a while now. Little did we know that a nice cool front would move through Thursday night and the weather would be perfect Friday. Larry Patrick, Cindi Barker, Shirley Pearce and I met up with Kelly on the Strand and shot for about 2 hours, ending with some fitness shots and portraits near sunset. We used our favorite strobist-type lighting -- basically Nikon SB800 flash units fired through some simple light modifiers. The shot above was one of the first I took Friday. Kelly is just as fun and easy going as she is pretty. What a great smile, huh? Please watch my blog for more from this photo shoot.
Tuesday, October 13, 2009
In the Trenches #8
 For the record, here's my final image with matt and frame, and below is the before and after. While texuring isn't for everyone, it sure can add some uniqueness to an otherwise bland image. What I find really interesting is how you can adjust exposure with the overlay's tones, and how you can push an image into a different color palette and mood with blending modes and masks.
Monday, October 12, 2009
In the Trenches #7
 What I really envisioned for this image was a dark edge, and while I liked the emulsion and tones from the textures previously added, I decided to add another texture to impart a dark edge. The texture I used for this is below. I also added a mask and duplicated the right side and flipped it over to the left so both edges would be black. I also duplicated the bottom left corner in a couple of other layer blends to warm up that corner of the image because the grey tones from the first layer were showing through a bit too much. As I look at this image now, I think maybe I could have even gone further with the bottom corners -- possibly making them a little more brown to better match the brown emulsion vignetting at the top. One of the most difficult things about adding textures for me is how various parts of an image interact with an overlay tone. For example, in this image the pink shirt goes completely black in the lower right, while there is detail in all the other corners. There's also a pretty extreme bit of grunge in the lower left. As a graphic artist, I really gravitate towards symmetry, but sometimes with these grunge-type textures you just have to go with the randomness they introduce.
Sunday, October 11, 2009
In the Trenches #6
 OK, I really need to do something about the background. And I can't help but think this texture is the right one for the job. Layer #6: texture again. I cycle through the blending modes with the identical texture -- this time with the previous color dodge layer in the mix, and hard light mode catches my eye. I think it definitely accomplishes what I'd like for the background, brings your attention to the face, and brings the yellow tint to the face back to more of a semi-realistic warm shade. So, I use this layer at 100% in hard light blending mode. Interesting that I don't mask the texture below at all on either layer I've used it on ... and both blending modes are ones I don't use very often. They seem to add some nice highlights and toning to the face while taming the harsh background ... and no masks whatsoever. Amazing.
Saturday, October 10, 2009
In the Trenches #5
 There are two issues now in my mind: the lifeless skin tones and the blown out background. Whenever I have an image that is fairly ordinary I tend to think of adding texture and edges to give it a unique twist. Maybe it's a crutch I tend to lean on pretty heavily at times, but I've honestly found that sometimes those images that are the most ordinary are the best ones to texture. I think a better image stands by itself, but others take a few layers of texture to make stand out. So, layer #5: texture. I added the texture below thinking it might help the background. I cycled through the blending modes quickly, and surprisingly the one that I picked was color dodge (not one I use very often). And even more surprisingly, it wasn't the background that I liked here, it was how it interacted with the face. I thought it brought in some nice highlights to the hair, made the eyes pop with more green, and made the face somewhat porcelain, maybe with a slight yellow tint. All those things I thought were positive if I was going to take this into more of a crossprocessed, vintage look. The opacity was reduced to 83%, which made the background even more blown out...what can you do.
Friday, October 9, 2009
In the Trenches #4
 After two very destructive layers to bring up the exposure and sharpness, this is Layer #4: cloning and touch-ups. This is normally one of my first layers, but I guess when you have a shot so soft and poorly exposed as this one those issues take precedence. I merged the existing layers together on a new layer (Control, Alt, Shift, E) and touched up the blemishes around the mouth, a couple of stray hairs on the cheek, and got rid of those awful shadows under the eyes. It's tricky touching up a portrait of a child. You hate to make this into too much of a glamour shot on such a young subject, but at the same time for me as a retoucher there's a minimum amount required. I tried to keep that in mind here -- no selective brightening or color shifting, just cloning to get rid of distractions. What starts to enter my mind here is that after Topaz, sharpening, and now retouching, I'm left with skin tones that are somewhat lifeless -- somehow the warmth has been lost. And while the face has improved the background is still blown out. Still a long way to go.
Thursday, October 8, 2009
In the Trenches #3
 Those shadows under the eyes are really bothering me now. But similar to the way an oncologist works with chemotherapy, I work destructively before I start building things back in -- Layer #3: Sharpening. OK, I never sharpen this early in a workflow, but this image was so soft and so exposure-challenged that I just dove right in here. In the back of my mind, I was thinking this was the critical step, and right away sharpening would tell me if this image had any future or not. Layer added with a generous Unsharp mask, normal blending mode, 100% opacity. Mask below for reference. There's enough sharpness here (eyes and the hair along the cheek) that I feel it's worth continuing. But sharpening on top of Topaz has put some pretty awful ruts in the face. Still not a printable image, but maybe it's sharp enough for onscreen.
Wednesday, October 7, 2009
In the Trenches #2
 Since I just got Topaz Adjust, that seemed like the place to begin -- Layer #2: Topaz Adjust. A former boss used to say, "when you only have a hammer, everything starts to look like a nail;" Photoshop corollary: when you just bought Topaz Adjust, every image looks like it needs its shadows lifted. Honestly, I think it did a reasonable job brightening the face; but similar to Lucis Art, random bits of unattractive ruts and creases appear. Note dark circles under the eyes. Yikes. At this point I'm still seeing this image as a Topaz test rather than anything worth keeping. I added a mask and applied it selectively mainly to the face and helmet, also decreased the opacity of the layer overall to 73%. For reference, the mask is below. Again, nothing too spectacular, still working fast and loose.
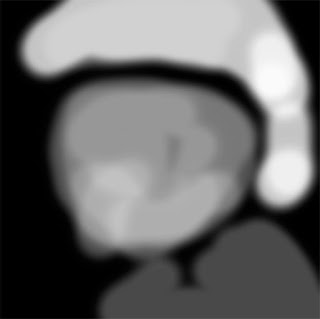
Tuesday, October 6, 2009
In the Trenches #1
 As promised, here's my base image I'm going to be spending the next seven consecutive days posting about. As bad as it looks, note that this is after some Adobe Camera Raw tweaks, so it was pretty horrible straight out of camera -- white skating surface with backlighting behind a face hidden in a helmet -- no flash, no HDR. There's a fair amount of fill applied here in ACR just to get it to this point. It was chosen to test Topaz Adjust, a relatively new Photoshop add-on that can be used to heighten contrast and bring out shadow detail ... and as you'll see later in the week, it did a pretty good job with this image. But you'll also be seeing how blending modes can be used to key shift an image into a completely different color range. You'll also see my workflow -- masks, textures, and all. Feel free to comment as we go -- not necessarily about the image but about my workflow and thoughts about what direction you'd want to take the image on each post. No fancy gallery frames on these photos -- this is going to be down in the trenches Photoshop work. Oh, and by the way, go ahead and click the image to see a larger version. As if this image didn't have enough problems, it's probably one of the least sharp I've ever taken.
Into the trenches we go.
Subscribe to:
Posts (Atom)